Adding competence grids to the Dakora+ App
Since the Dakora+ App is integrated on a local Moodle installation, all the competence grids have to be added to courses on Moodle using the Exabis Competence Grid plug-in.

How to do it?
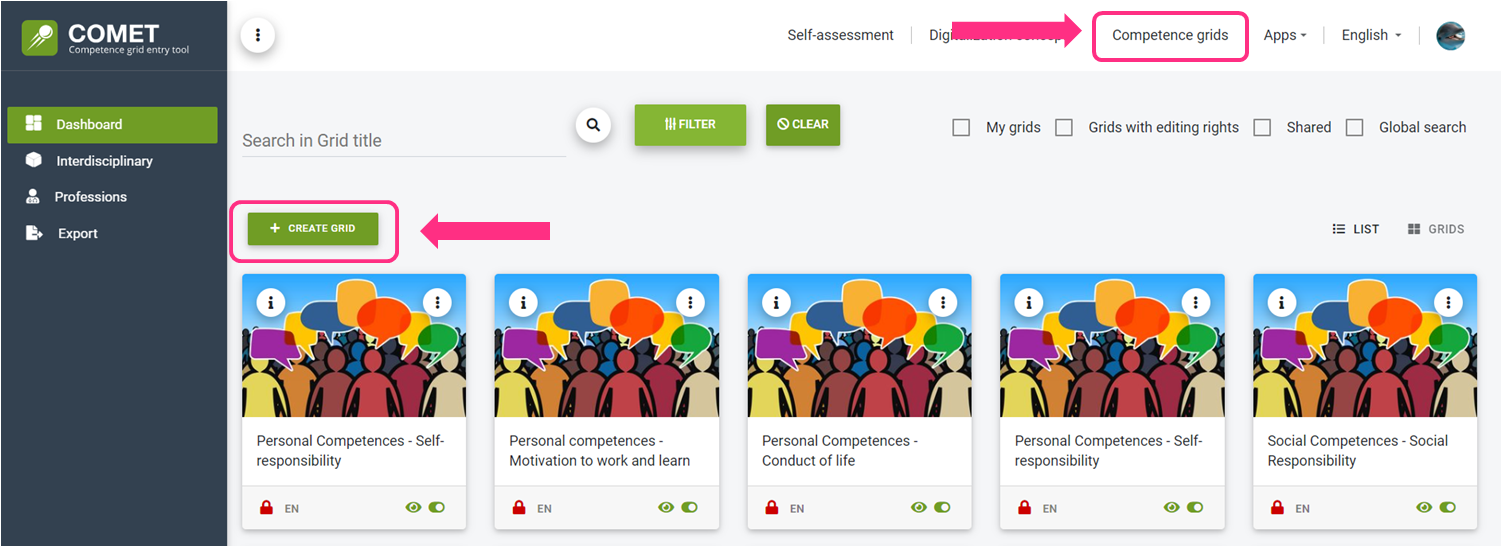
#1. Using Comet tool
Comet is an open source tool for creating competence grids that could be used in Moodle (and therefore in Dakora+). Go to comet.edustandards.org, and register.

In the “COMPETENCE GRIDS” tab click “create grid” button.
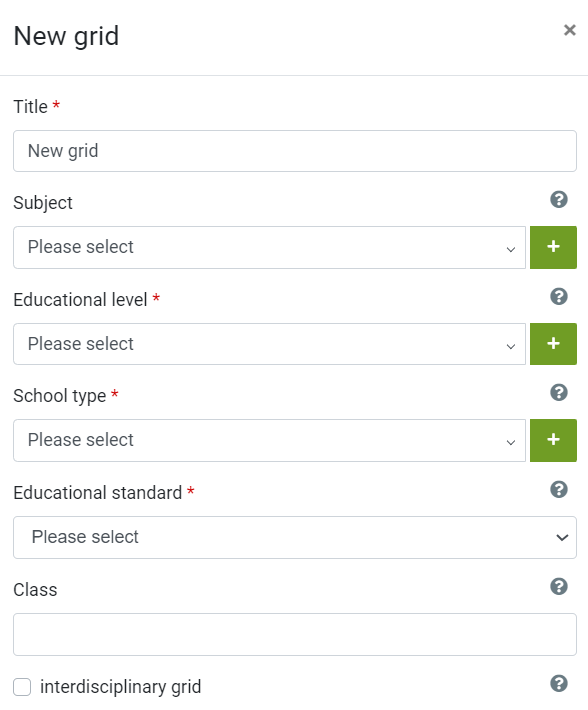
Fill in the grid’s metadata, such as its name, subject, educational level etc. and save.
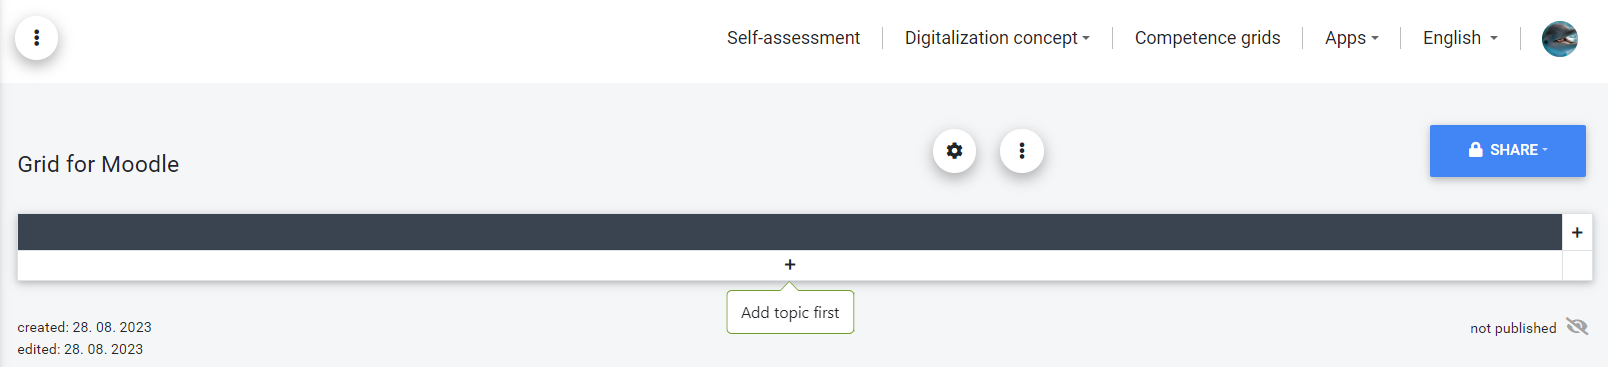
You will then be transferred to the grid’s view where you will be able to add grid’s topics, difficulty levels, competencies and child competencies.
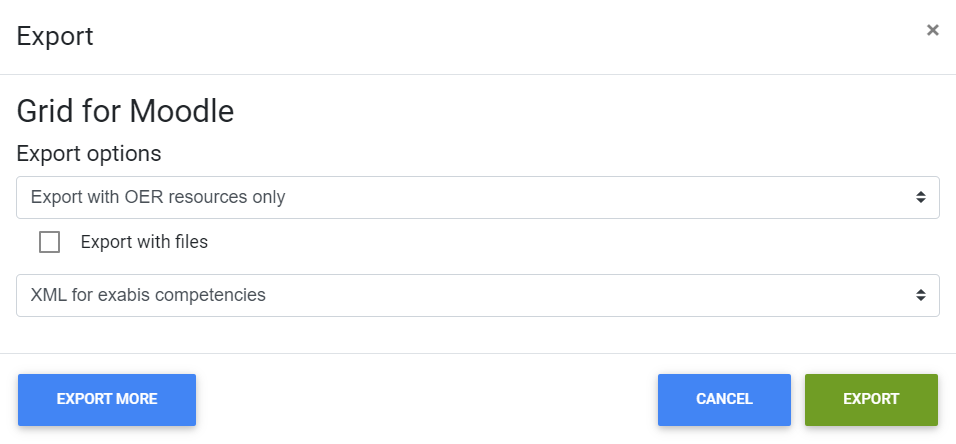
Once you have created your grid, you can export it to XML file, and in this format upload the grid to Moodle.
To do so, click the three vertical dots above the grid and choose “Export”. A window will pop up, where you can decide if you would like to export the grid with or without materials, and the format of exported file. Make sure to choose “XML for exabis competencies”. In this way, via Comet-created grids, you can export more that one competence grid and add them all to the course.

To read more about the Comet tool and its features check COMET documentation.
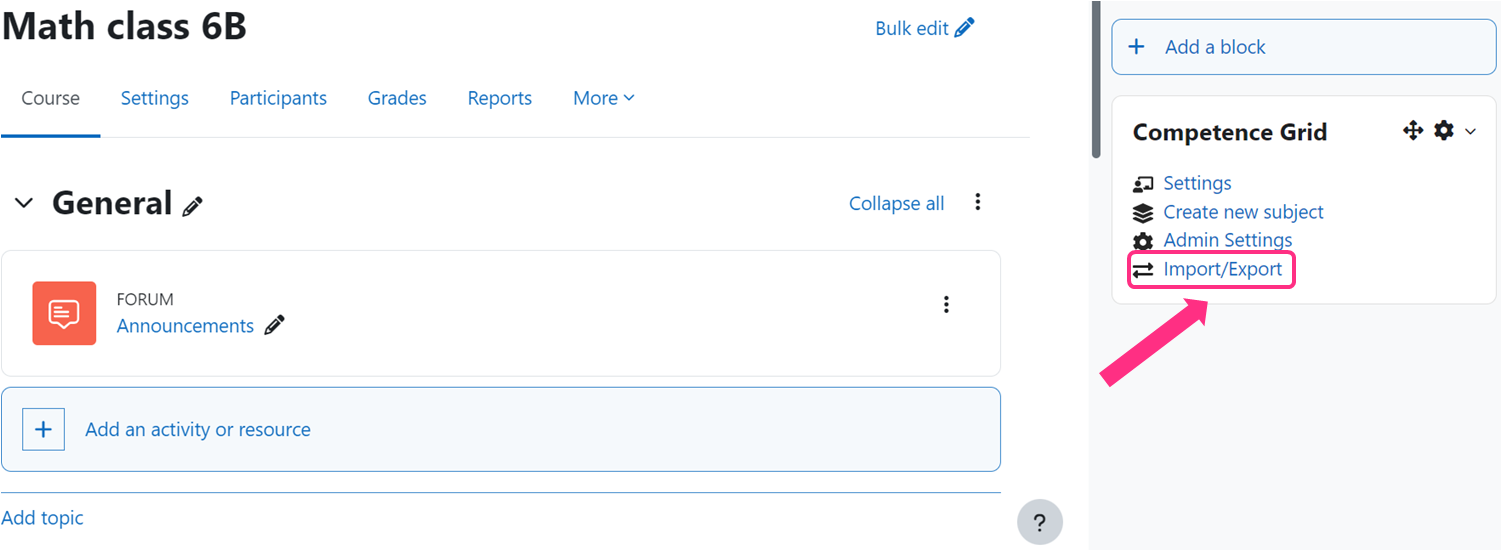
Now you can import the grid into Moodle. To do so open the Moodle course you would like to add your grid to, and in editing mode, click “Import/Export” in Exabis Competence Grid block.
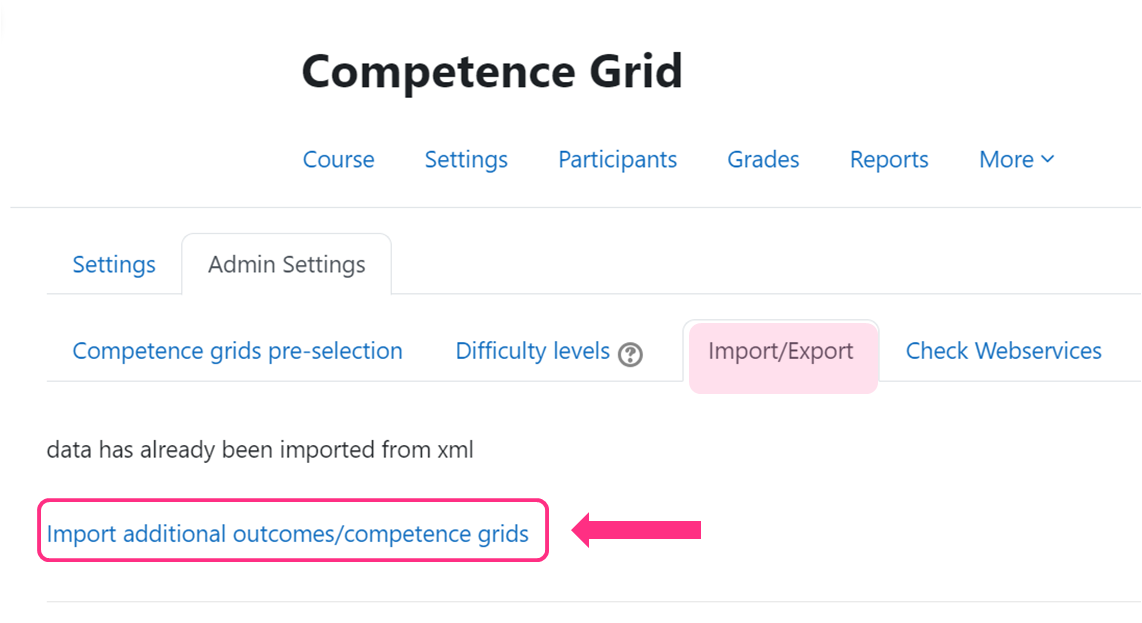
From the “IMPORT/EXPORT” tab, select “Import additional outcomes/competence grids”.
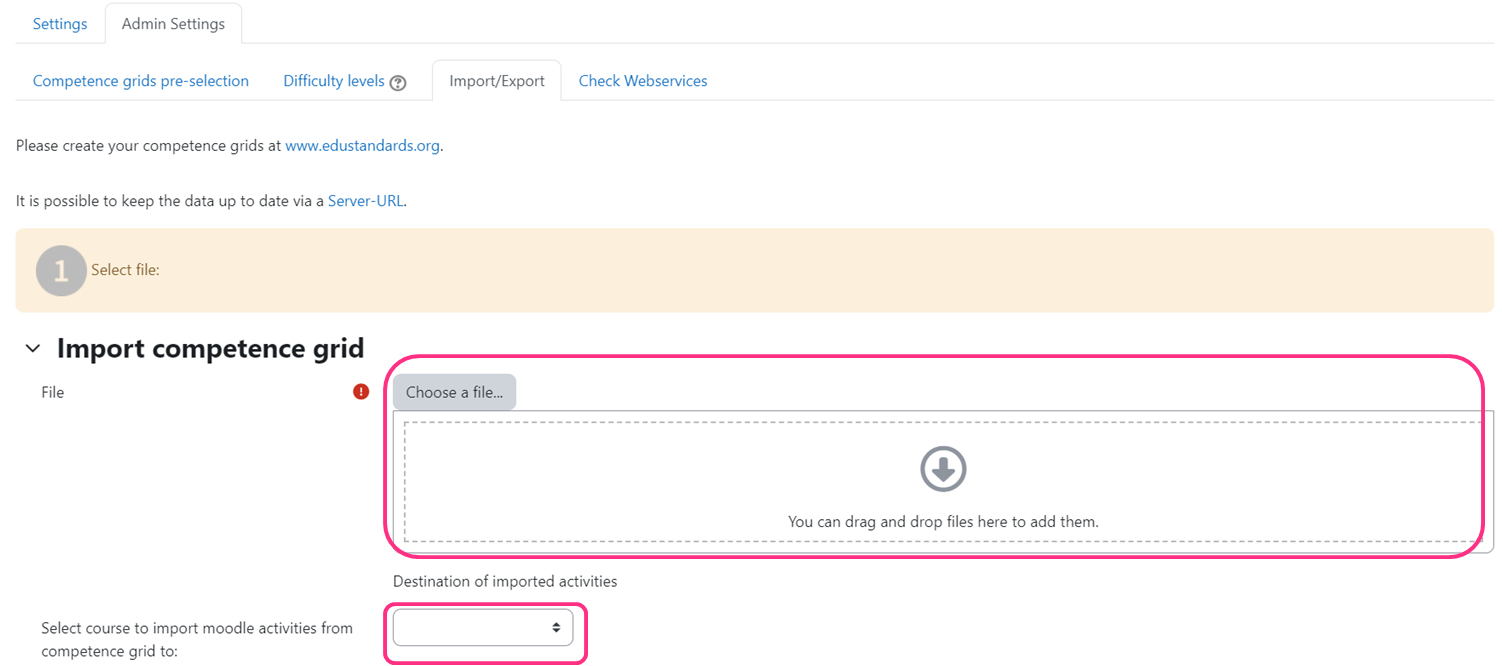
Drag the exported from the Comet tool XML file and drop it onto the designated area, or click the “choose the file” button to select the file directly from your PC. Then, chose the course, to which the grid should be associated.
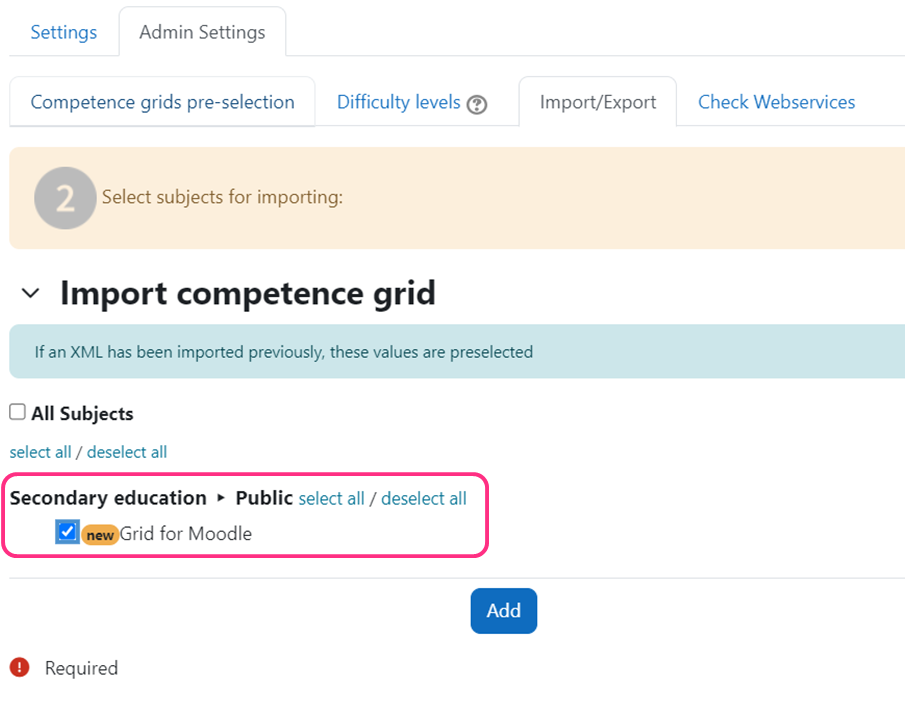
If added correctly, a configuration wizard should open. You should see the metadata of your grid: educational level, school type and the name of the grid. If the metadata matches the one from your grid, tick the name of the grid and click add.
The system will prompt consecutive actions. In the next step you will see one more time the metadata of your course. If you imported more than one grid, in this view you will see the metadata of all previously imported grids. Tick your grid, and click “confirm”.

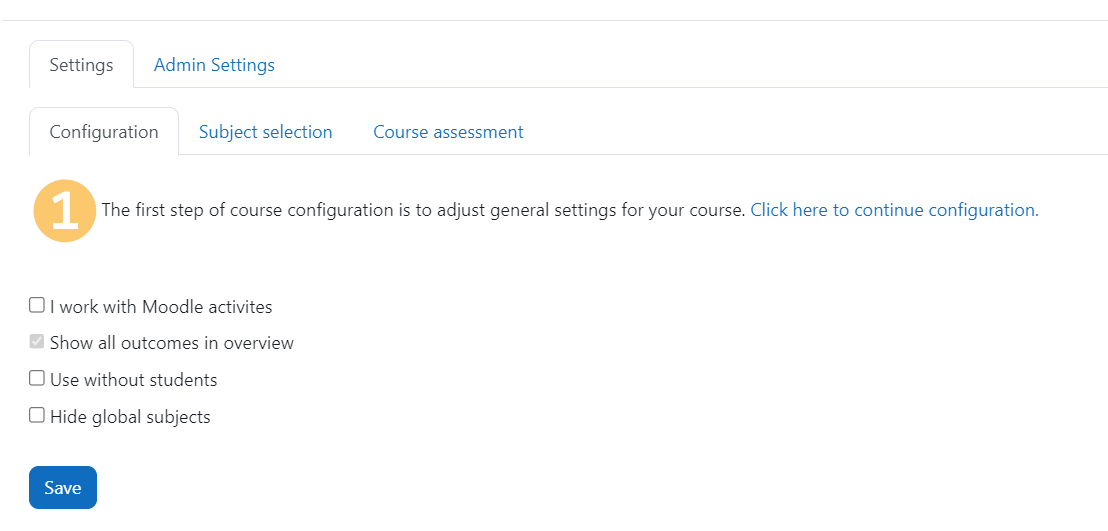
Next, you will see general settings of the grid in relation to the course. It is recommended to keep only the default setting “show all outcomes in overview”.
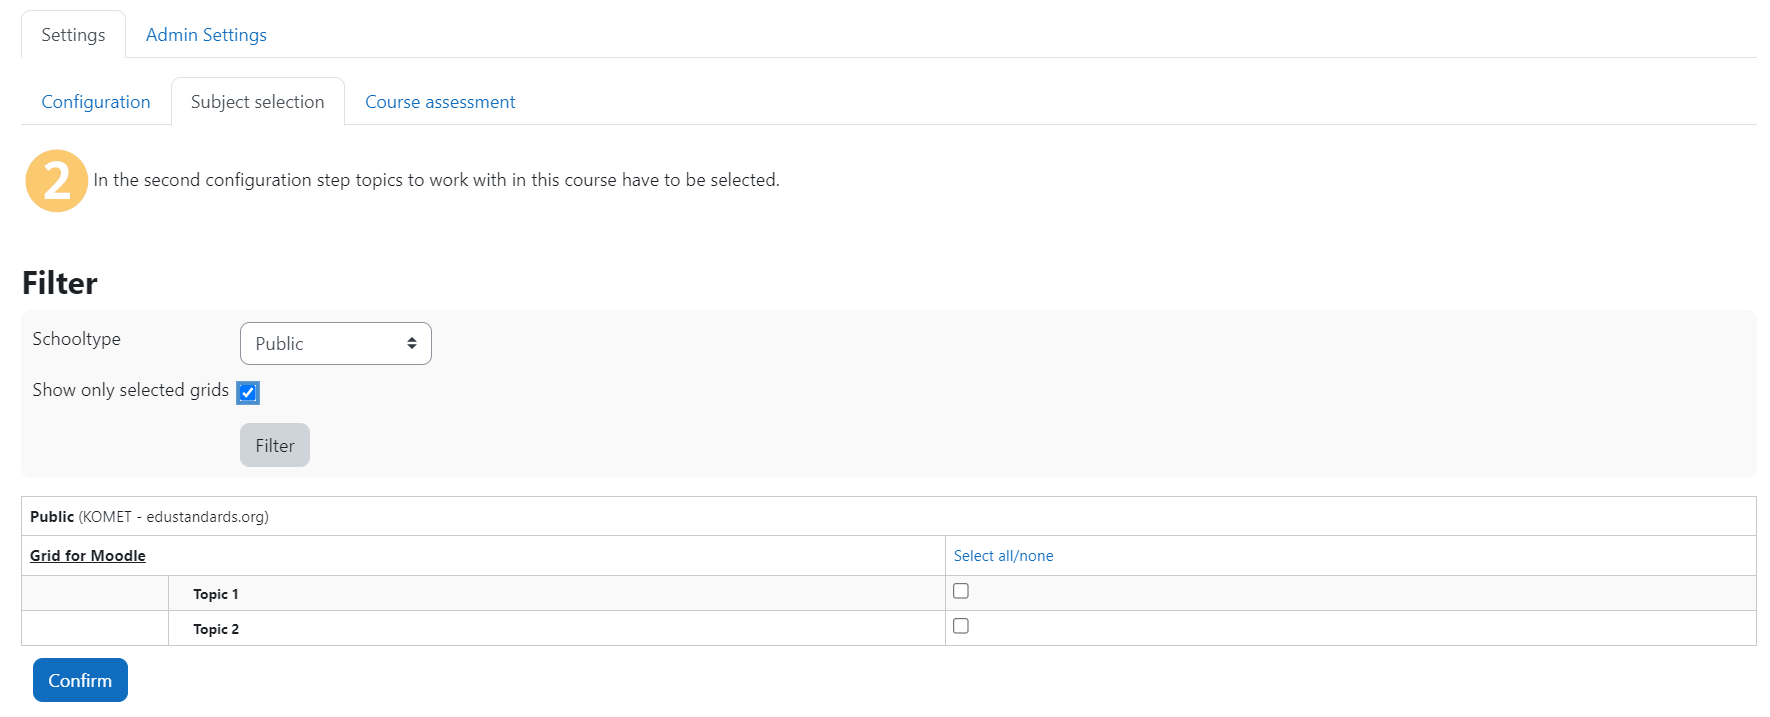
In the next step you will see all the topics in your grid.
At this point you can decide which topics you would like to associate with the course. You can tick all or only selected topics. At the end click “confirm”.
The configuration is completed. You can choose either overview or competence grid to see your grid.
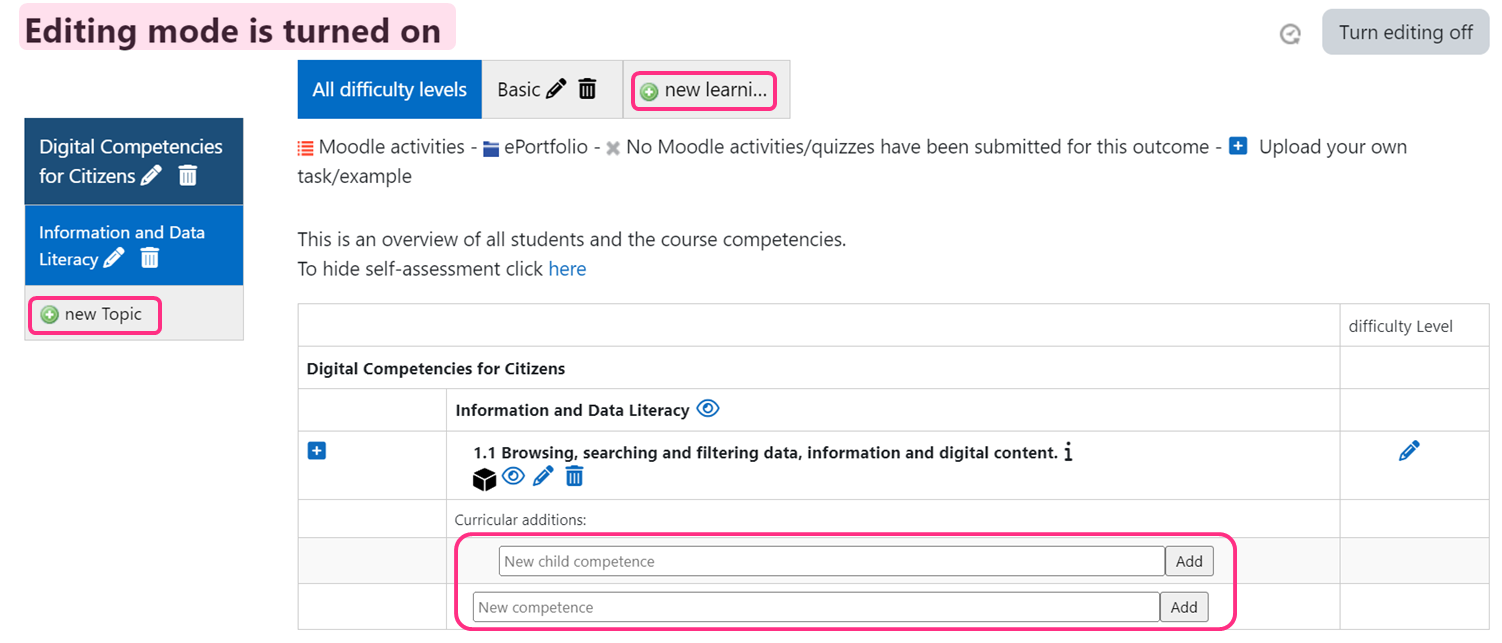
#2. Manually
You can create a gid directly in the Exabic Competence Grid block. However, you manually you can create only one grid, whereas the above option allows you to import multiple grids and add them to the same course.
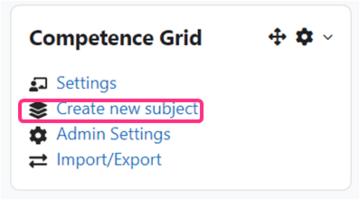
In the Exabis Competence Grid block choose “Create new subject”
Add the name of the subject, and set the first topic, difficulty level, and competence.
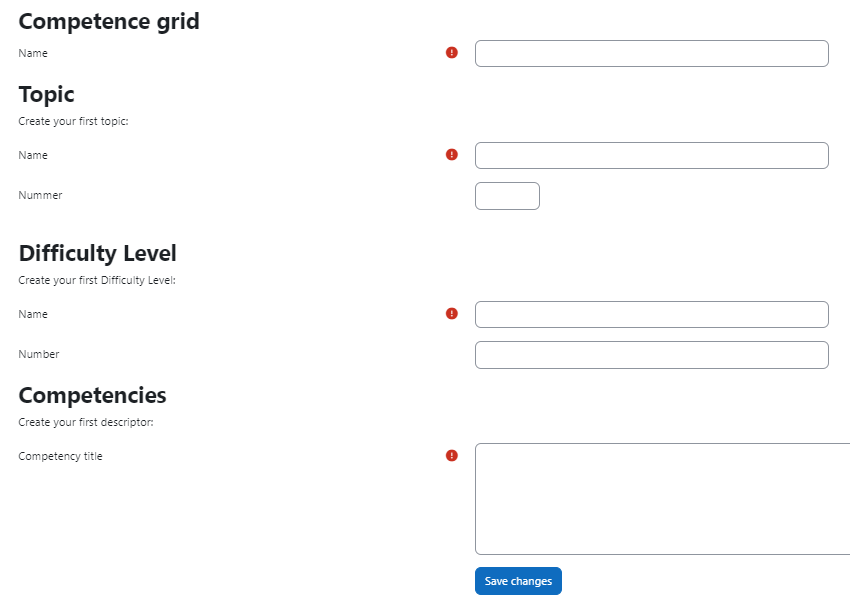
The frame of your grid is now created. In the next step you will be prompted to add more raws, columns and competencies, as well as child competencies to your grid. You can do it in the editing mode.
Grids can be added to one or more subjects, and all of them will be displayed in Dakora+. This means, that trainers are able to access all competence grids added to Moodle through Dakora+ and select either whole grids or certain competencies that they would like to add to their course.