Overview
In the overview, the competence areas and corresponding competences of the selected competence grids are displayed. One selected grid is displayed at a time. It can be filtered by participant.
View
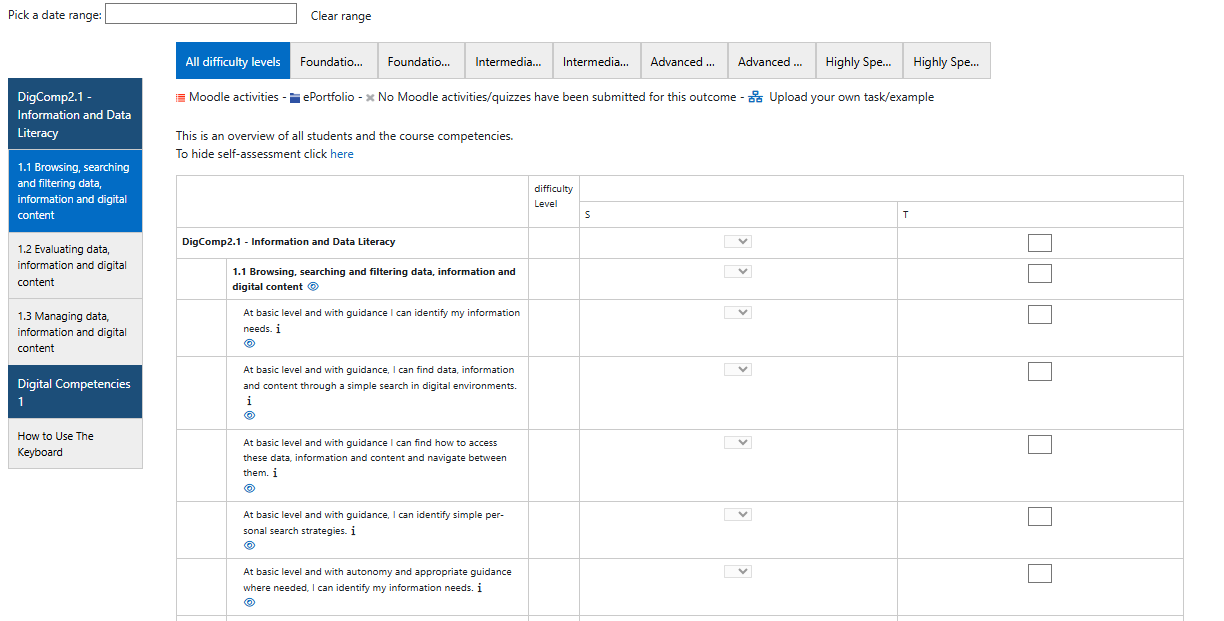
Under the Competence grid tab, all selected competence areas are displayed in grid format. The name of the grid and its areas are listed in the left-hand column. The horizontal levels of the grid represent the learning progress. These can be defined and named when creating the grid. Learning progressions represent competencies and sub-competencies in such a way that the level of the competencies and the assigned materials/tasks is also shown, with the difficulty increasing steadily from left to right. This requires corresponding consideration in the competency grid.
The second column provides an overview of the competencies/partial competencies of the selected competency areas and the associated tasks. Here, the level for the respective sub-competence can be selected using the drop-down menu and the achievement of the competence can be confirmed individually using the assessment field.
This assessment can be selected individually for all students and each competence.
The students' self-assessments are displayed in the “S” column. This self-assessment cannot be changed by the teacher, but can only be viewed and serves as the basis for further reflection processes.

Material/Competence or Area in Use
The lock icon next to an element symbolizes that the element is locked because it is already in use.

A material is in use and therefore locked if…
- it is on the weekly schedule.
- it is in the planning buffer.
- a submission already exists.
A competence/sub-competence is in use and therefore locked if…
- an assessment exists.
- one of the sub-competences is in use.
- one of the attached materials is in use.
A competence area is in use and therefore locked if…
- assessments exist.
- one of the competences/sub-competences/materials is in use.
Release material for resubmission
Once trainers have graded the submitted material, it can no longer be edited by the students. If the Exabis ePortfolio is also being used, it is likewise not possible for students to modify or delete the submission in the ePortfolio block.
However, trainers can release the edited material for resubmission using the following symbol:

If Exabis ePortfolio is used, it results in a process portfolio that reflects development throughout the learning process.
Place material from the competency grid into the planning storage
The planning storage is intended to support the trainer’s preparatory work. For example, in preparation for a school year or a larger topic area, materials can be preselected and collected in the planning buffer.

At the appropriate time, the relevant content can be transferred from the trainer’s planning buffer to the students’ planning buffer. From that point on, the materials are also available to the students and can be added to their weekly plans.
Additionally, as a means of individualization, extra material or assignments can be placed in the planning storage for specific students. This always depends on what the trainer deems necessary for the individual students at that moment.
If a trainer wants to assign a task from the competence grid directly to the weekly plan or planning storage of specific students, this can be done by clicking on the weekly plan symbol next to the desired material: 
If material is to be added to the weekly plan for all students, it must first be placed in the planning storage 
Note: At the beginning, it should be checked whether materials are to be added to the weekly plan for all course participants or only for a specific student. This can be identified by the preselection in the dropdown menu. For this, the editing mode must be turned off.
Planning storage in the competence grid
By clicking the symbol on the top right side, 
To add material for specific students to the weekly plan or planning storage, the material and the person must be selected and confirmed by clicking the button “Add selected learning materials to the weekly plan of the selected learners.” After approval, the trainer’s view will be cleared; to make any changes, you must switch to the individual weekly plans of the students.
If material needs to be deleted from the planning storage, this can be easily done by dragging and dropping it onto the trash can icon. Additionally, the entire planning storage can be cleared.